| View previous topic :: View next topic |
| Author |
Message |
alan wilson
Joined: 09 Oct 2007
Posts: 347
Location: Usually next to allegro and mig..in Blackburn
|
 Posted: Wed May 14, 2008 7:57 pm Post subject: Posted: Wed May 14, 2008 7:57 pm Post subject: |
 |
|
Hi all
Final post before the car hits the road - seats are done (thank God) there`s a pic up on Flikr for all who can`t make the National
Looking forward to tomorrow, first drive of the car in 3 years!! I`ve joined the AA just in case but hope there are no problems on Saturday driving to Birmingham
Cheers
Alan |
|
| Back to top |
|
 |
Roger Feist
Joined: 27 Feb 2008
Posts: 28
Location: kent
|
| Posted: Thu May 15, 2008 8:47 am Post subject: |
|
|
GOOD LUCK on the test drive 
Carn't wait to sit it at the national on Sunday 
_________________
It's always better with the roof down ! It's the crayford's way !! |
|
| Back to top |
|
|
alan wilson
Joined: 09 Oct 2007
Posts: 347
Location: Usually next to allegro and mig..in Blackburn
|
| Posted: Sat May 24, 2008 9:54 pm Post subject: |
|
|
Hi all
Just checked out the electrical fire that happened on the way back from the 35th and it`s not good - the entire loom is burnt out. It looks like the white wire feeding the gauges and voltage stabiliser has been chafing through on the frame of the car behind the dash. The resulting fire was due to BL not having a fuse in that circuit. The wire eventually burnt through but all the adjacent wires in the loom are damaged too. So I`m going to make a new loom and bypass the old one completely, hope I get it done for Tatton on Saturday !
Cheers
Alan |
|
| Back to top |
|
|
alan wilson
Joined: 09 Oct 2007
Posts: 347
Location: Usually next to allegro and mig..in Blackburn
|
| Posted: Sun May 25, 2008 4:34 pm Post subject: |
|
|
fixed the damage today,not as bad as I first thught but as the pic shows a fair bit of work -looks good for Tatton though
 |
|
| Back to top |
|
|
alan wilson
Joined: 09 Oct 2007
Posts: 347
Location: Usually next to allegro and mig..in Blackburn
|
| Posted: Wed Nov 26, 2008 7:02 pm Post subject: |
|
|
Latest news: new engine build is now underway. Thanks to Lanky Tim who brought the engine up from Stoke ( much to the regret of his rear carpets!! ) I`m the proud owner of a completely siezed 1275 engine and box. Today I finally got round to stripping the thing down ( I thought it might be a good idea after a customer hit it with his car ! ). The bores are a lump of rust as the cylinders were full of water, the engne came from the car that Tim bought for the wings and had been sat in a breakers yard for many years. After breaking my flywheel extractor tool ( but the flywheel came off anyway ) I managed to get the engine seperated from the box. Then the good news started: the gearbox appears to be in perfect nick inside, the crankshaft and shell bearings are like new AND - the pistons actually aren`t that badly siezed and come out with a little persuasion. The block assembly is off to Nuttalls Engineering who are the A series experts - Howard Nuttall used to build rally engines for competition Minis in the 60`s / 70`s and has passed the legacy on to his son Matthew - tomorrow to be stripped, re-bored to 1380 and rebuilt with a fast road cam, duplex timing gears and chain and reshelled. The head is then being fitted with unleaded seats, larger valves, double valve springs then polished and ported. A 1.75" HSIF carb will be going on, water heated inlet manifold and 3 branch performance exhaust manifold. End product - around 95 BHP. All ancillaries will be new ie water and oil pumps, alternator, starter etc. I ain`t spending all this cash on the rebuild to be let down by a second hand ancillary ( like the alternator that decided to pack up on the morning of a recent North West area run).
whilst the motor is out I`ll finally be doing the engine bay in yellow and renewing all the bits in view to make plenty, plenty shiny. The new engine will be colour coded to the car with black gearbox, yellow block, black head and a nice alloy rocker cover, hopefully sporting an Austin badge with 1.4 on it.
The 998cc coming out may be heading off to the South for Andy Cripps - it purrs like a pussycat and burns no oil at all - mind you it`s only done 31K since new and it is an A+.
Keep you all informed and pics where possible
Cheers
Alan |
|
| Back to top |
|
|
alan wilson
Joined: 09 Oct 2007
Posts: 347
Location: Usually next to allegro and mig..in Blackburn
|
| Posted: Thu Nov 27, 2008 5:32 pm Post subject: |
|
|
Pics of engine and box:

 |
|
| Back to top |
|
|
LankyTim
Joined: 29 Apr 2008
Posts: 474
Location: Stoke on Trent
|
| Posted: Thu Nov 27, 2008 8:33 pm Post subject: |
|
|
Very glad to hear that old boat anchor is being given a new lease of life, infact is going to be made much better than it ever was in its previous life.
Acutally, its a bit unfair to refer to it as a "boat anchor" A rusting lump of cast iron that had been at the bottom of the sea for years would be in better condition than this engine!
Incase anybody missed it, here it is, "as found" It had been outside exposed to the elements for 10 or so years. I removed the head to inspect the bores and found them to be full of silt and mud- no idea how it got in!
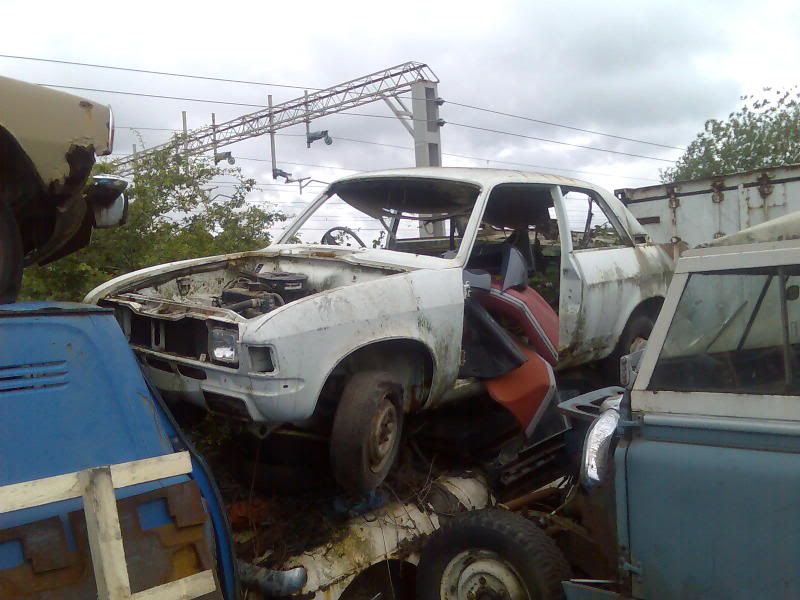
_________________
1979 Allegro 1500 S2 special 4 door saloon
Previous allegros,
1977 Allegro 1300 super 2 door. SCRAPPED
1978 Allegro 1300 super 2 door. SCRAPPED
 |
|
| Back to top |
|
|
alan wilson
Joined: 09 Oct 2007
Posts: 347
Location: Usually next to allegro and mig..in Blackburn
|
| Posted: Mon Dec 08, 2008 6:42 pm Post subject: |
|
|
Well, the anchor is now heading for another large amount of water - I dropped it off this morning at the engineers, they`re going to strip it completely and lower it into a massive steam / chemical bath thingy to destroy all the oil, grime, paint etc ready to be rebored to 73.5mm - the magic figure for 1380cc. I`ll then pick up the old camshaft from them and after crimbo it`s off to Minisport in Burnley for a new fast road cam kit and duplex timing gear kit (the cam is an exchange unit). Nuttall snr. is going to lighten and balance the existing flywheel saving me a good £100, they`re VERY expensive to buy off the shelf. The block will be ready in early February, then it`s on to the head overhaul. In the meantime, Stevenson Transmissions in Preston are stripping, cleaning and re-assembling the gearbox with a 4 pin diff unit. Once all the bits are back I`ll be re-assembling the power plant in March and refitting to the car. Should be a much quicker journey to Tatton next year...
Cheers
Alan |
|
| Back to top |
|
|
Caroline
Joined: 19 Sep 2007
Posts: 145
Location: Lincolnshire
|
| Posted: Mon Dec 08, 2008 7:59 pm Post subject: |
|
|
Hi Alan, just had a quick look thru all the photos of the car, love the colour!!! very eye catching, and the side repeaters are a nice touch too. Was just wondering what the alloys you have fitted are called, and also what PCD they are, I was told in the past that the Allegros are a 4x114, or have you put a hub adaptor on? Am interested in fitting alloys to my series 3 so any info you have would be really useful. Thanks
_________________
Owner of Charlie, 1982 Nautilus Blue Series 3, HL. AWARD WINNING, and as seen on TV (East Midlands Today news 3rd Sept) |
|
| Back to top |
|
|
alan wilson
Joined: 09 Oct 2007
Posts: 347
Location: Usually next to allegro and mig..in Blackburn
|
| Posted: Tue Dec 09, 2008 12:41 am Post subject: |
|
|
Hi Caroline, yes, that`s spot on - the wheels are 4x114.3 PCD ( the distance between the stud holes ) more commonly refered to as 114. Very important is the offset which needs to be 0-35mm, this ensures lock to lock clearance of all the vital bits! The clearance between the rear tyres and the suspension bump stops is a bit close but mine haven`t fouled up to now and I`ve done a couple of thousand miles since fitting. Because the camber of the rear wheels alters when the car is jacked up and the rear wheels are suspended the tyres do in fact catch the bump stops but when the car is on the ground there`s no problem. If you fit these wheels make sure the MOT tester is aware of this and get him to check the car on the floor under its own weight. The only other thing to check is that the front wheels don`t catch the front wing forward edge on turning from lock to lock - I had that problem because I had fitted a pattern wing when restoring the car and the wheelarch shape was different to a genuine wing - nothing a bit of careful re-shaping couldn`t sort out !!
Common fitment of these wheels was early Rover 800 series and also early Honda Accord. I have 195/50r15 tyres fitted to mine and they seem to be perfect for the job. The full spec of mine is:
Foxpro five spoke 7JX15, 4X114 PCD, 0-35mm offset
Hope this helps
Cheers
Alan
_________________
Well someone had to do it..... |
|
| Back to top |
|
|
LankyTim
Joined: 29 Apr 2008
Posts: 474
Location: Stoke on Trent
|
| Posted: Tue Dec 09, 2008 2:21 pm Post subject: |
|
|
Alan, how much is it to have the flywheel lightened and do they do E series fast cams?
_________________
1979 Allegro 1500 S2 special 4 door saloon
Previous allegros,
1977 Allegro 1300 super 2 door. SCRAPPED
1978 Allegro 1300 super 2 door. SCRAPPED
|
|
| Back to top |
|
|
alan wilson
Joined: 09 Oct 2007
Posts: 347
Location: Usually next to allegro and mig..in Blackburn
|
| Posted: Tue Dec 09, 2008 4:29 pm Post subject: |
|
|
Tim
I`ll ask about the flywheel, the man to speak to is Darren Bedworth - he`s in the member list - who has a naughty Equipe with a fast road cam and lightened flywheel and it`s overbored to about 1850 I believe. He was at Tatton this year, I thought you may have met him. PM him for the best info on E series mods, my people only do A series and told me to get my own cam anyway.
Cheers
Alan
_________________
Well someone had to do it..... |
|
| Back to top |
|
|
LankyTim
Joined: 29 Apr 2008
Posts: 474
Location: Stoke on Trent
|
| Posted: Wed Dec 10, 2008 1:49 am Post subject: |
|
|
Cheers Alan, will do!
So many E series lying about, so little time...
_________________
1979 Allegro 1500 S2 special 4 door saloon
Previous allegros,
1977 Allegro 1300 super 2 door. SCRAPPED
1978 Allegro 1300 super 2 door. SCRAPPED
|
|
| Back to top |
|
|
alan wilson
Joined: 09 Oct 2007
Posts: 347
Location: Usually next to allegro and mig..in Blackburn
|
| Posted: Mon Feb 07, 2011 7:25 pm Post subject: |
|
|
Hi all
Latest thing in SWK mods - my long awaited HLS twin headlamp upgrade.Many thanks to Andy Robinson who provided the necessary bits.
Here`s the new look anyway:

I stuck it all in today after fitting new headlamp units all round - a snip at £39.95 for all four, and bulb types to boot ( I`m not a great fan of sealed beams). They came from Bradford ( Andy, thanks for the pickup) and fit directly into the Allegro shells with no modification. However, as always, I wanted the best possible result so I decided to upgrade the bulbs to the "all weather" high power types. Thats when I realised that the main beam bulbs are 100w, which means - 100X4=400w, 400/12v=33.33amps current. Not good for a car designed for 2X55w bulbs. It`s a simple conclusion that the light and dip switches are NOT going to stand for it, so I`m having to fit a high power relay into the circuit. Also, the alternator output at 37amps is a bit dicey, but there again we don`t drive around for long periods with the main beams on, so I`m going to take a chance on that one as I replaced the alternator for a brand new one 500 miles ago.
Anyway, I`ve also ordered a load of new wiring for them as it needs changing due to the H1 main beam bulbs and addition of a relay. The wiring is coming from a superb supplier, Autosparks, who provide wire from the roll in multiple lengths of a metre and stock all the original British standard colours. On that note, they also supply switches and multiplugs as fitted to the Allegro, they`re worth a look.
Last thing now is respray the lamp surrounds to colour code them to the bodywork.
Cheers
Alan
_________________
Well someone had to do it..... |
|
| Back to top |
|
|
alan wilson
Joined: 09 Oct 2007
Posts: 347
Location: Usually next to allegro and mig..in Blackburn
|
| Posted: Sat Feb 26, 2011 7:47 pm Post subject: |
|
|
Update - all wired up, new "fuel injection" badge fitted to grille and surrounds painted:

_________________
Well someone had to do it..... |
|
| Back to top |
|
|
|

 FAQ
FAQ Search
 Usergroups
 Register
 Profile
 Log in to check your private messages
 Log in


